Screen sharing
Step by step Video:
One of the latest exciting features of NotebookCast is Screen Sharing, after connecting to the audio session you will be able to share any window throw the whiteboard. This will allow you to share screen live with others and draw annotation over the screen in real-time with your usual drawing tool. You can also flip easily between regular whiteboard pages and the shared screen giving extreme versatility
A Step by step
- Start or Join a NotebookCast Whiteboard
- Join the audio call:
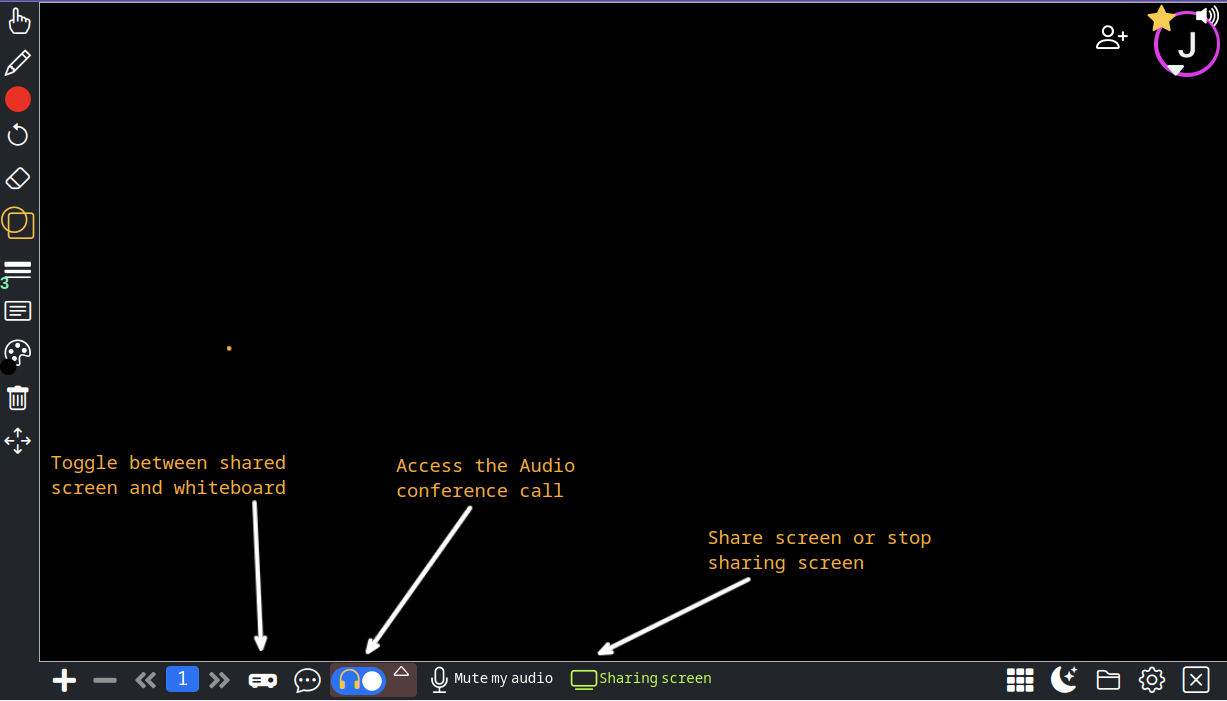
- Click on the Audio call switch with the headset icon .
- Make sure your microphone is not muted.
- Start Window/Screen Sharing:
- Once you're in the audio call session, you'll see a black toolbar at the bottom of the screen.
- Look for the "Share Screen" button. It usually looks like a monitor icon . Click on it.
- Select Screen to Share:
- A window will pop up, showing the screens and applications you can share.
- You can choose to share your entire screen, a specific application window, or browser tab.
- Select the screen or application you want to share and click on the "Share" button.
- While screen sharing is active, the share button will be green.
- Stop Screen or application to Sharing:
- When you're done sharing, you can click on the screen share button again.
- The button color will change back to white from green indicating screen share is stopped.
For best results, it is recommended to share a window rather that the full screen, such as a browser, editor, etc
You can navigate between the screen sharing and all the whiteboard pages seamlessly without interrupting the share screen activity. This allows for fast ability to show any shared screen, annotate on the screen if needed, and flip to whiteboard for further explanation using the pages navigator.